This page describes general writing guidelines and terminology the doc team uses when writing documentation.
Edit me
The following table defines the basic standards implemented to ensure consistency throughout all documentation, both online and print, unless otherwise noted.
| Element | Description | Correct Example | Incorrect Example |
|---|---|---|---|
| Abbreviations/Acronyms | The first time an abbreviation/acronym appears in a document, spell out the full name and put the abbreviation/acronym in parenthesis. After it has been spelled out, all other references can be the abbreviation or acronym. | Data Stewardship Platform (DSP®) | Data Stewardship Platform – DSP® |
| Action Verb when appropriate | Start all steps with a present tense action verb. |
|
|
| Serial Comma | Do not use a serial comma with “and” or “or,” i.e., when listing items in a sentence, do not insert a comma before the “and” or the “or” to introduce the last item in the list. | Enter name, address and phone number. | Enter the name, address, and phone number. |
| Icons |
Refer to UI elements like this as icons.
Identify the icon as such in the steps. |
Click the Process Areas icon. | Click Process Areas. |
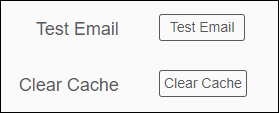
| Button |
Refer to UI elements like the Clear Cache one below as a button.
 Do not include the word “button” for buttons in the Page toolbar, such as Save, Edit or Add. These button are always in the same place, so there’s no need to qualify them.
|
Click Add. | Click the Add button. |
| Capitalization |
In general, do not capitalize application terminology such as roles, scenarios and column properties unless indicating a particular term.
NOTE: Field names in the documentation must match the field names in the product. If the product contains a capitalization error, documentation must reflect this. The following are always capitalized:
|
|
|
| Check box (Print) |
|
Click the Update Allowed check box. | Check the Update Allowed check box. |
| Check box (Online) |
Follow standards for print, with these clarifications.
Use Cases: When using the check box to add or to edit in numbered steps in a use case, use the standard: “Click the [check box name] check box to [action].” or “Click the [check box name] check box to disable it, allowing [action]” Field Descriptions: When describing a check box in Field Descriptions, use the standard “If checked. . . .” to start the descriptions (or “If unchecked, . . .” if that’s the preferred setting). |
Use Case:
Click UNIQUE INDEX check box to build a unique index. Field Description: If checked, a unique index is built. |
N/A |
| Code Text |
|
The final three columns in the `#AuditProcedure` table are `boaAuditProcedureCounter`, `boaAuditProcedureType` and `boaAuditProcedureName`. | The final three columns in the #AuditProcedure table are boaAuditProcedureCounter, boaAuditProcedureType and boaAuditProcedureName. |
| Colloquialism, Jargon and popular expressions | Avoid using jargon and popular expressions (Colloquialisms) | Wait until the page loads… | Wait until the page cuts on… |
| Column Headings |
|
Click the Label column heading to sort the column. | Select label column heading to sort column. |
| Concise Language | Omit needless words. |
|
|
| Currency and numerical formats | Understand international currency and numerical formats. As with date and time formats, provide format standards for reference. | ||
| Date and time | Understand international date and time formats. Spell out the month in dates to avoid confusion. If needed provide format standards for reference. | For example, write, “The dates referenced in this article use the MM/DD/YYYY format.” at the beginning of an article. Or add a note, “NOTE: The format for the start and end date is MM/DD/YYYY.” | |
| Definitive Article | Use a definitive article (the, a, an, etc.), except when referring to buttons or the Vertical View as a clickable icon. |
|
|
| Emphasizing Words | When emphasizing a word or an action, format the word in red, bold and all small letters. | Do not click . . . |
Do NOT click . . .
Do not click . . . |
| Examples | Use “for example” and “as in” instead of e.g., and i.e. | For example, …; (for example, …) | …, as in… (i.e.,…) |
| Field Values |
|
|
|
| Fonts (Print) | See the Styles page for more information. | ||
| Headings (Print) |
|
Heading 1
Heading 2 Heading 3 |
|
| Icons (Print) |
|
Click the Targets icon on the Design page. | Select Targets. |
| Links (Print) |
|
Refer to Page Header for detailed information. Go to www.boaweb.com | Refer to the Page Header section for detailed information. |
| List Box |
|
|
|
| Navigation pane | Standard is “Navigation” is in italics, pane is lower case. | Select Configuration > Data Sources in the Navigation pane. | |
| Mood | Avoid conditional | You can edit the file. | You should edit the file. |
| NOTE |
|
NOTE: Column, Phrase Out and View Type column fields are not editable. | Note: Column, Phrase Out and View Type column fields are not editable. |
| Numbers | Spell out numbers 1-10 when not associated with a date, dollar amount or measurement. | The Switchboard contains five menu options. | The Switchboard contains 5 menu options. |
| Or |
|
|
|
| Parameters |
Use this boilerplate text for all Parameters topics:
Parameters are [component name]-specific settings that must be configured per installation. Parameters are delivered with recommended default values. Review these values and make any changes necessary for the installation. To configure trace parameters:
|
||
| Page vs. Screen |
|
The Request page displays. |
The Request screen displays.
The bottom frame displays. |
| Password | Describe as asterisks when adding a password in steps. | Displays asterisks representing the password for xxxxx. | |
| Personal Pronouns/Subjects (Online Help) |
Do not use “you”, “he”, “she”, “they” etc.
NOTE: Starting all steps using action verbs helps avoid personal pronouns and subjects.
|
|
|
| Referencing Written Material (Print) |
|
||
| Passive Voice | Avoid the use of passive voice when at all possible. Make it clear who or what performs an action. |
Click Vertical View.
Collect generates the reports. The Template Administrator configures the template process. |
The report is generated.
Vertical View should be clicked. The template process is configured. |
| Punctuation |
|
Click Add. | Click Add |
| Radio Buttons | Do not use the term radio button. Use option. | Click the Enable option. | Click the enable radio button. |
| SAP vs. Target System | Use “target system” instead of “SAP” when possible. | ||
| Screen Shots (Print) |
|
||
| Tables (Print) |
|
||
| Tense | Always use the present tense. | Click the Users button; the Users page displays. | Click the Users button; the Users page will display. |
| Time | Understand international date and time formats. Spell out the month in dates to avoid confusion. If needed provide format standards for reference. | For example, write, “The dates referenced in this article use the MM/DD/YYYY format.” at the beginning of an article. Or add a note, “NOTE: The format for the start and end date is MM/DD/YYYY.” | |
| Terms | Use terms consistently. For example, do not use edit, change, and update. Select and use only one form of the verb and use it consistently. | To edit the template, click Edit. If you need to edit the description, edit it in the Description text box. | To update the template, click Edit. If you need to change the description, you can edit the Description text box. |
| Trademarks |
The first trademarked product name that appears in a document is followed by the appropriate trademark symbol (™ or ®). All subsequent mentions of the trademarked product name are not followed by a trademark symbol. A list of current trademarks is available from the Legal department or at http://www.boaweb.com/trademarks/
Trademark symbols do not follow the product name if it appears as:
|
Select the dspcompose.bat file.
dspCompose™ is the replacement for cMass. |
|
| Verbs | Use the most specific verb possible. This avoids both ambiguity and wordiness, and creates strong writing. Prefer single word verbs to multiple word verbs. | "join" | "Put together" |
| Views |
When used in a sentence outside of a step in a use case:
|
When used in a sentence outside of a step in a use case:
Click the View Data icon on the Vertical View of a request role before import to ensure that the data in the view is appropriate for import into the request. When used in a step in a use case:
|
When used in a sentence outside of a step in a use case:
Click the View Data icon on the Vertical View of a request role before import to ensure that the data in the view is appropriate for import into the request. When used in a step in a use case:
|
| Voice and Gerunds |
|
Click Users; the Users page displays | Clicking Users opens the Users page. |